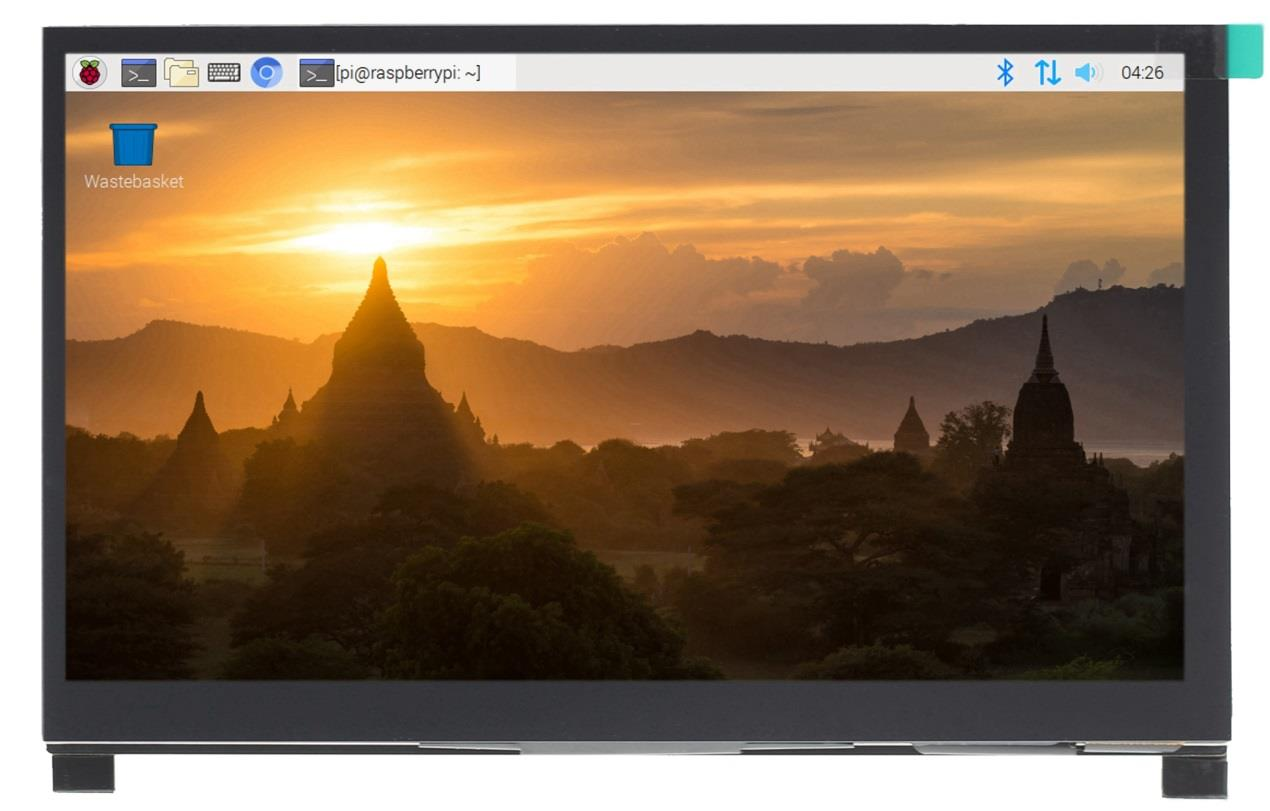
YQX6-7C 1024*600 7 Inch IPS HDMI LCD Display with 5-Point Capacitive Touch Screen
Premium Display Features
- 7-inch IPS display with wide viewing angles and true-to-life color reproduction
- High resolution 1024*600 display for crisp, detailed visuals
- Tempered glass touch panel with 6H hardness rating for durability
- 5-point capacitive touch screen for responsive multi-touch operation
- HDMI input interface for high-definition video connectivity
- 3.5mm audio output jack for external sound devices
- Dedicated backlight adjustment button for brightness control
- Compatible with Raspberry Pi, Banana Pi, and BeagleBone Black
- Plug-and-play support for Raspbian, Ubuntu, Kali, and Windows 10 IoT
- Works as a computer monitor with Windows 7/8/10 (touch support)
- Gaming console compatible with PS4, XBOX360, and Nintendo Switch
- CE and ROHS certified for quality assurance
Technical Specifications
| Size | 7.0 inch | Screen Type | IPS Screen |
| SKU | MPI7006 | Resolution | 1024*600 dots |
| Backlight Adjustment | Independent button | Touch | 5 point capacitive |
| Touch IC | GT911 | Power | MicroUSB (5V/2A) |
| Dimensions | 164.9 * 102 * 14.25 mm | Video Input | HDMI |
| Weight | 510 g (including packaging) | Audio Output | 3.5mm Audio Interface |
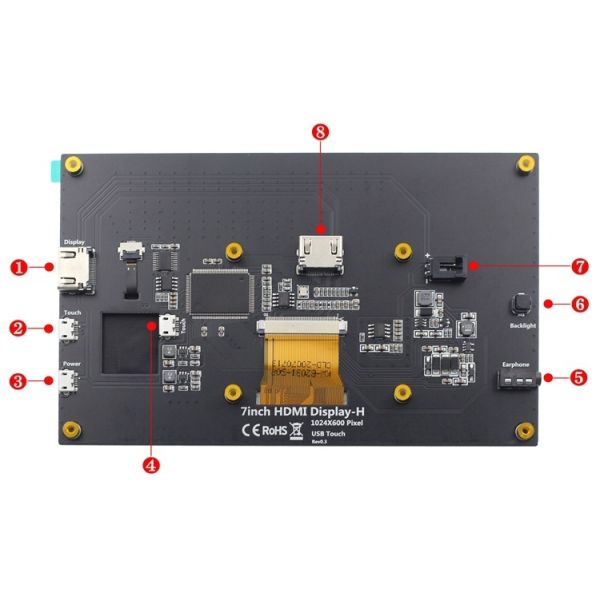
Interface Diagram
Installation Guide
Raspberry Pi Installation
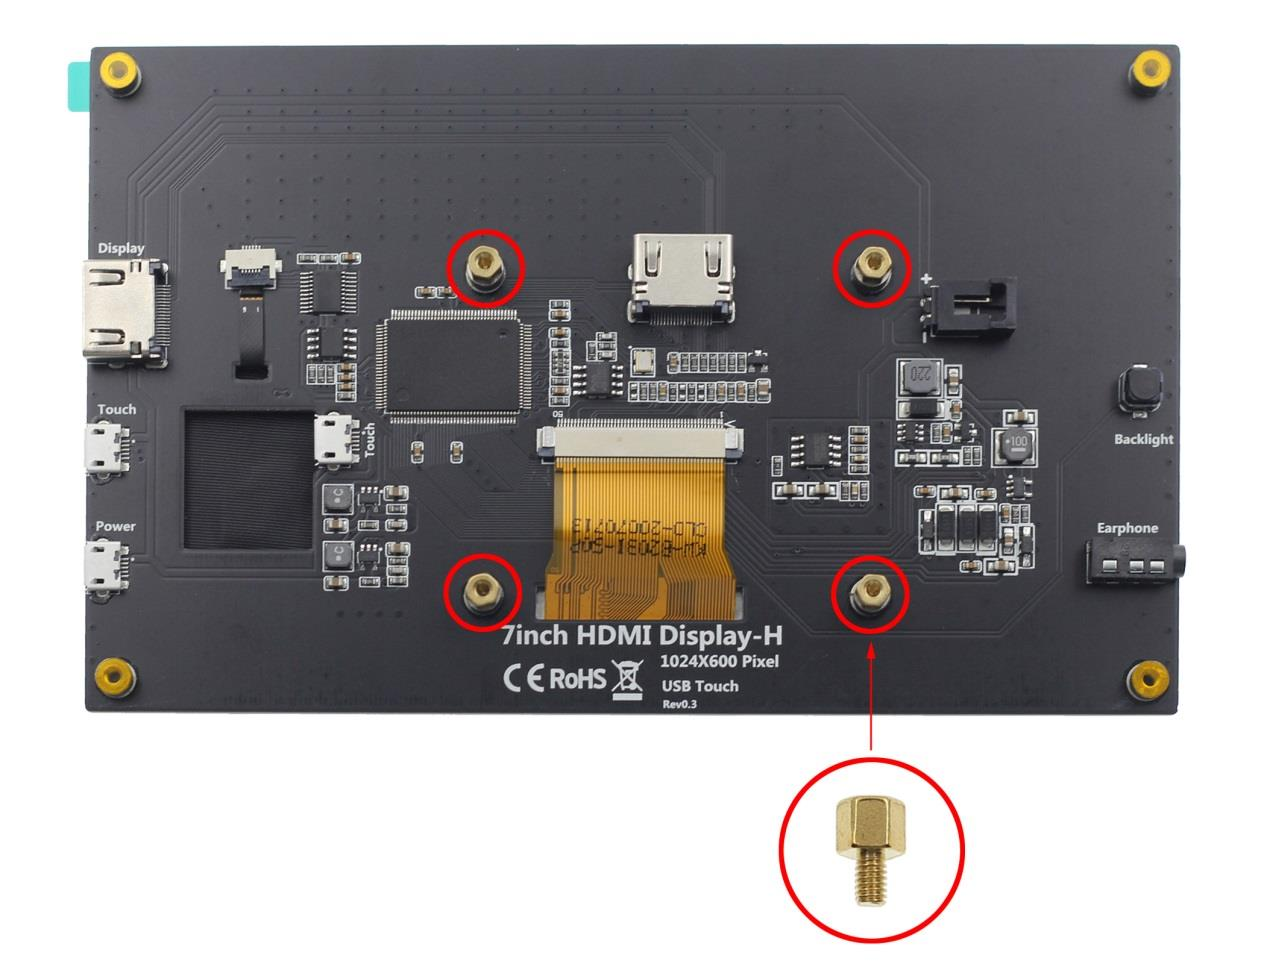
1.
Install 4 copper posts
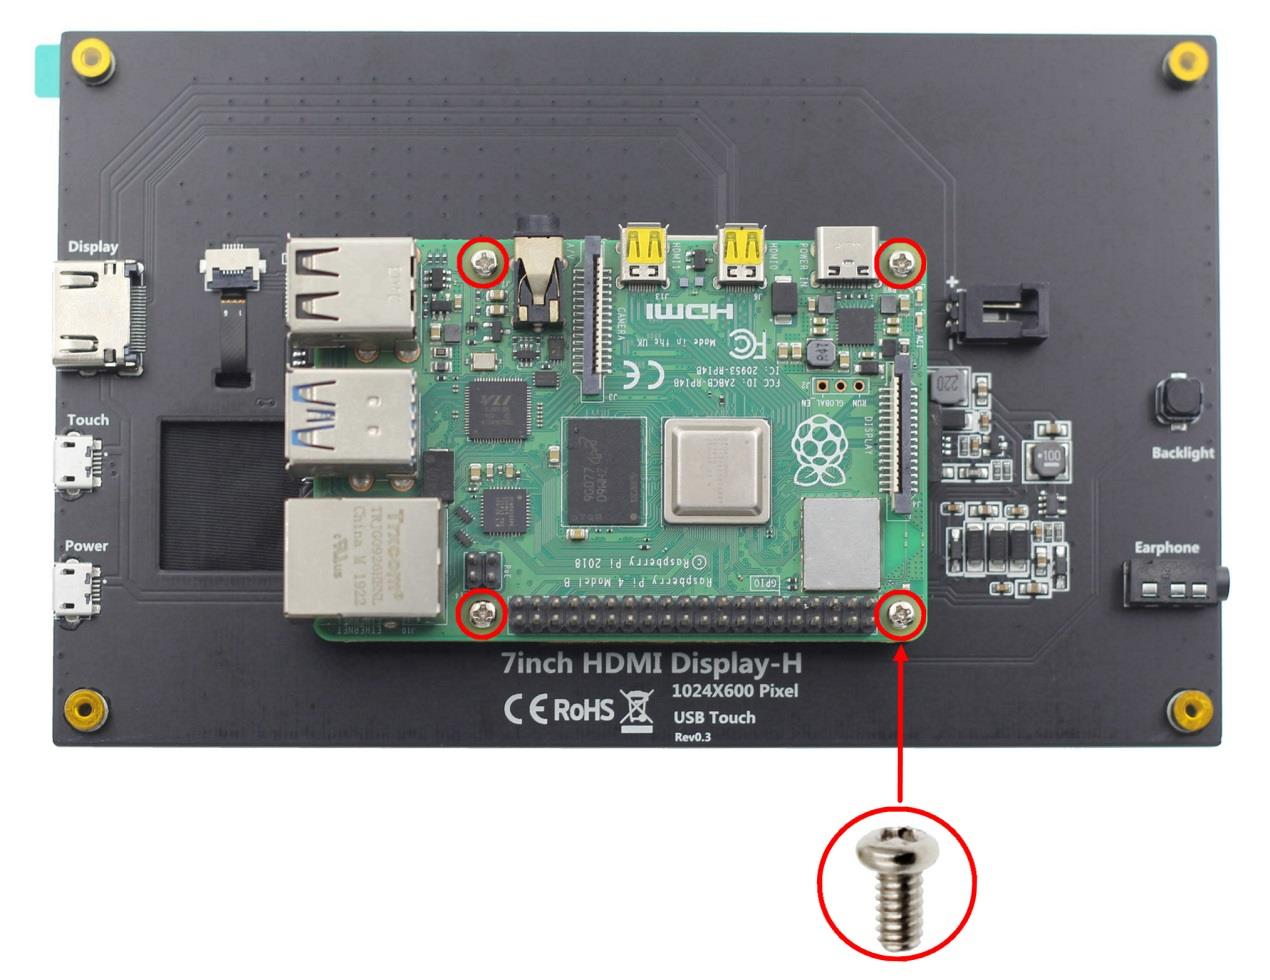
2.
Place Raspberry Pi and install 4 screws (M2.5)

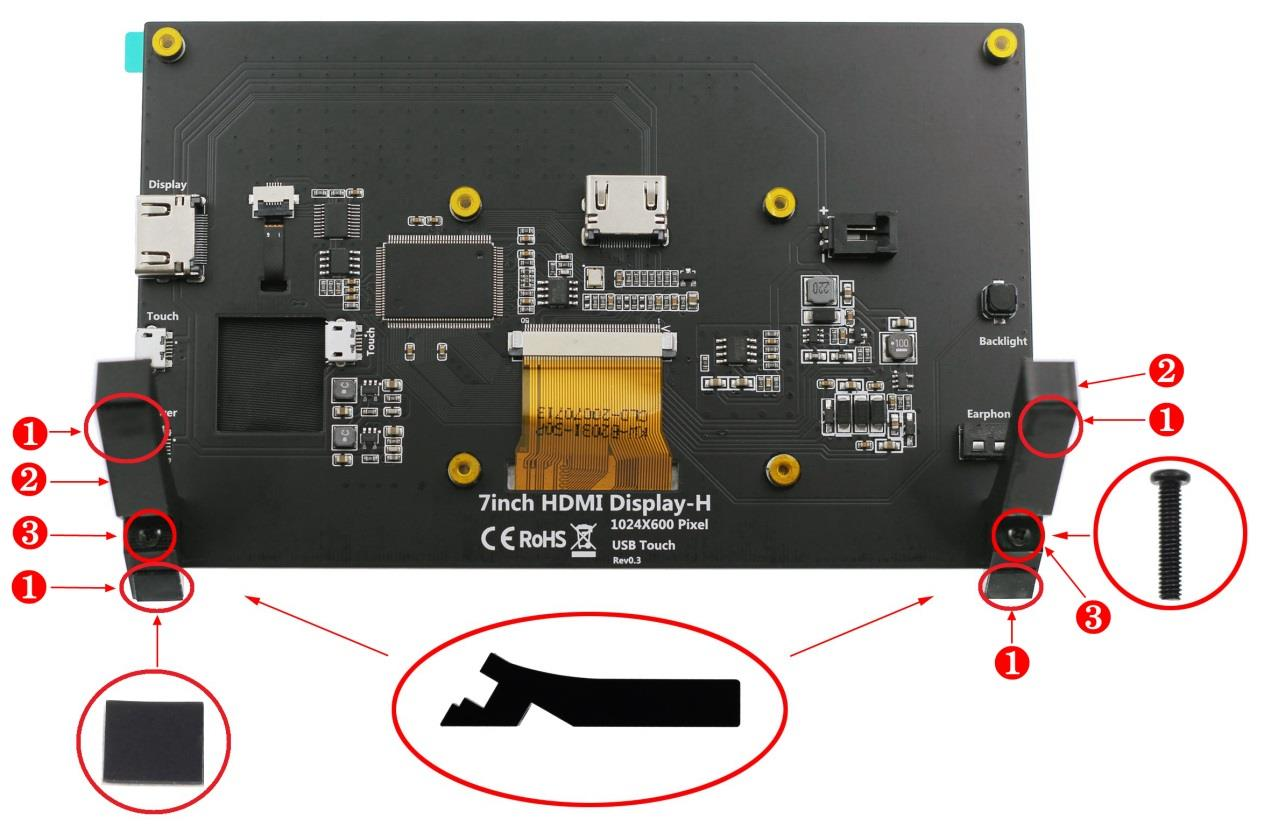
Stand Installation

Connection Guides
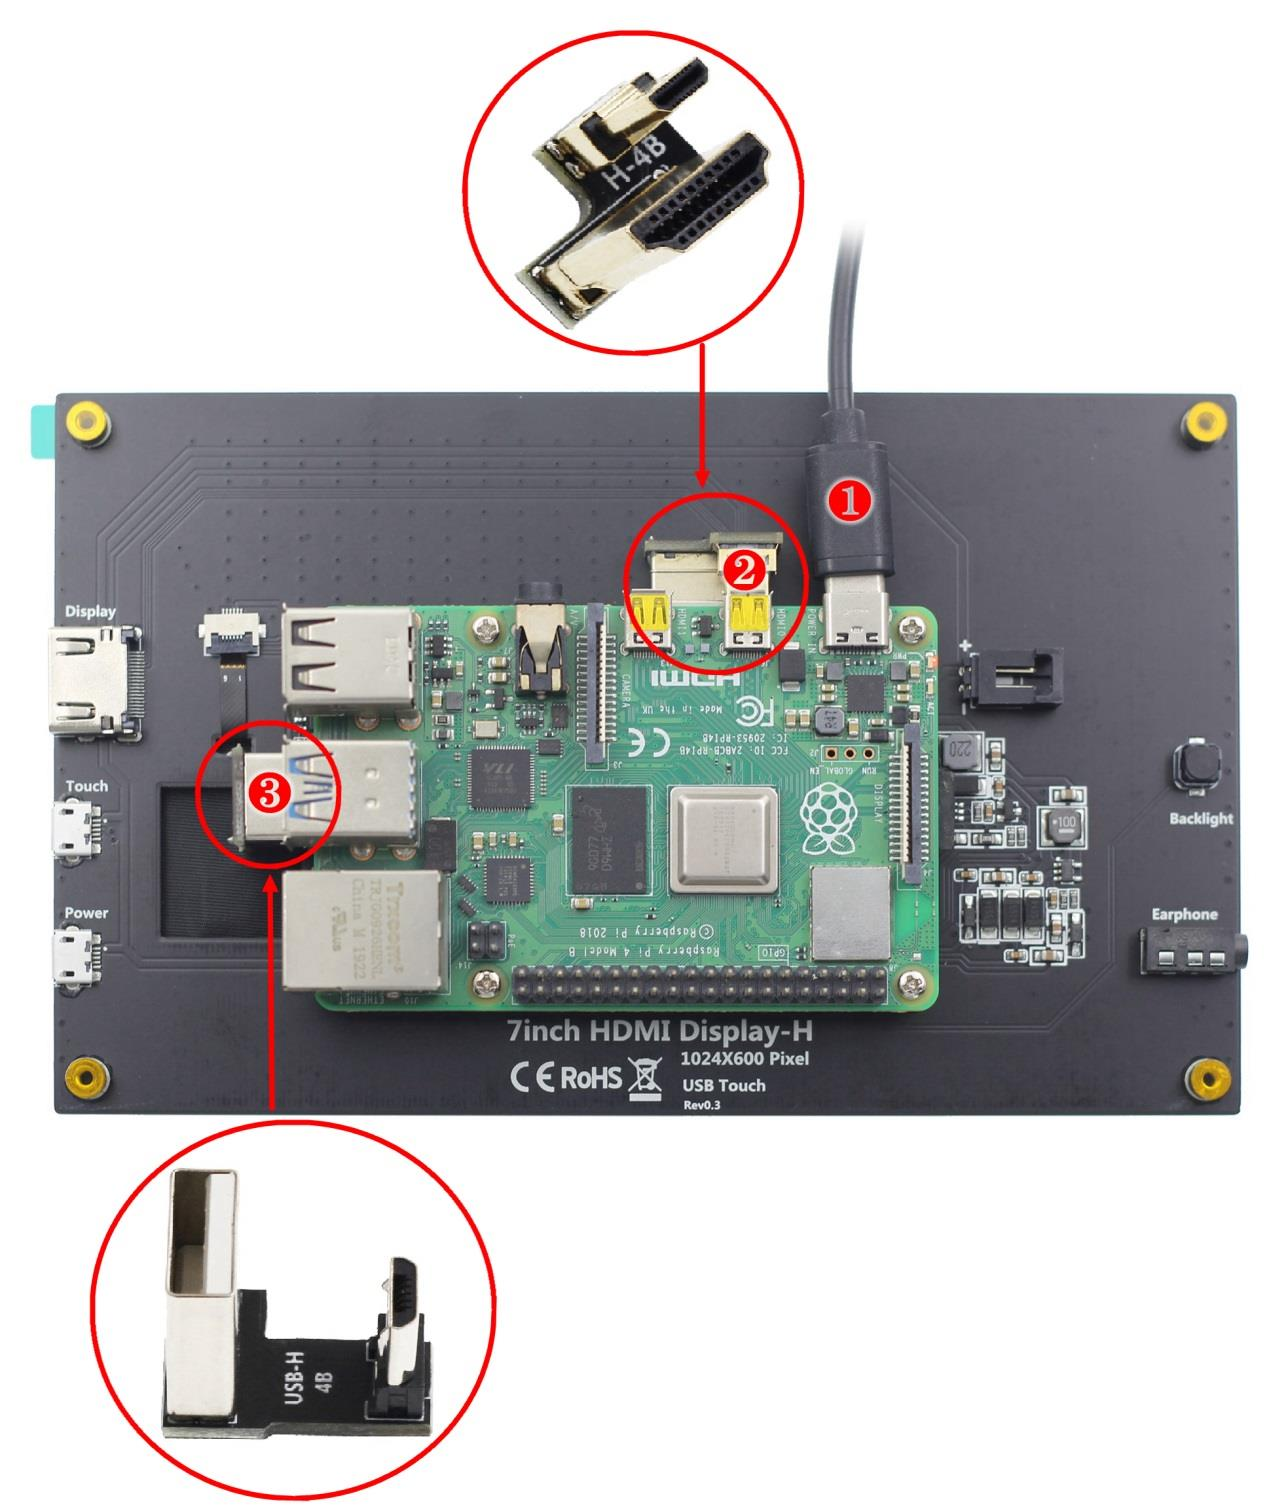
Raspberry Pi 4 Connection

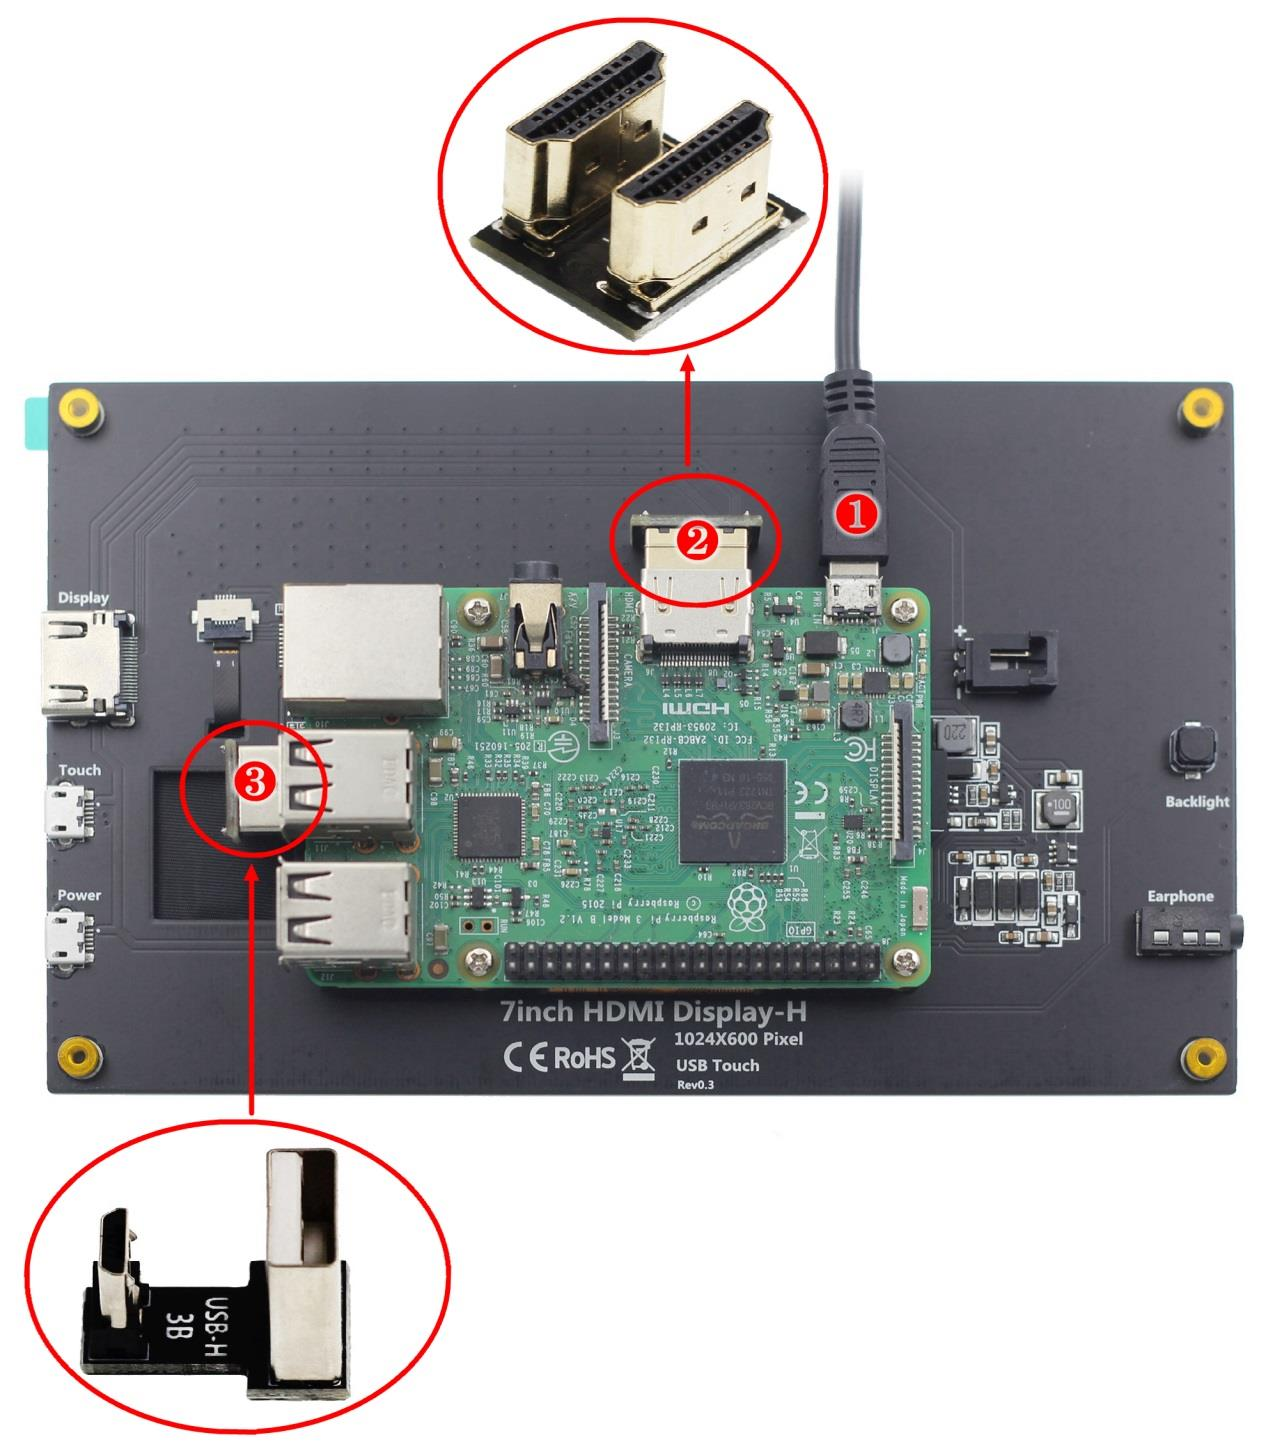
Raspberry Pi 3 Connection

Important Note: Always connect cables before powering the Raspberry Pi. Use 2.5A power supply for Raspberry Pi 3B+, 3B, 2B, B+, A models. Use full 3A power supply for Raspberry Pi 4B.
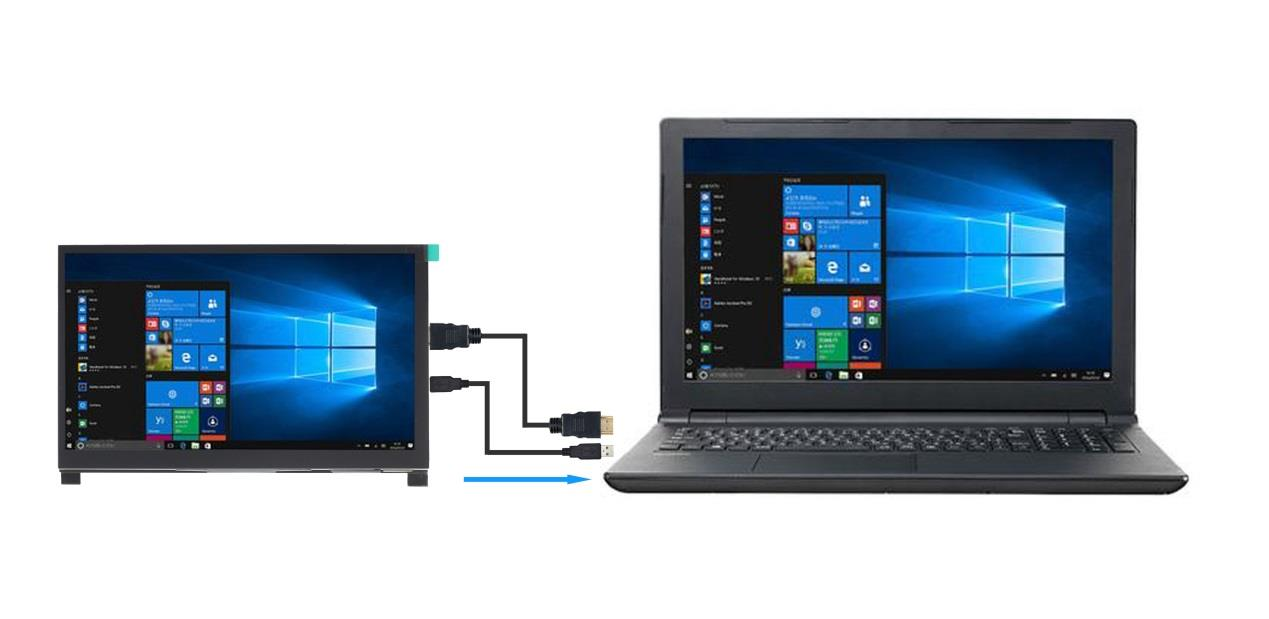
PC/Laptop Connection

System Setup Instructions
1. Download Official Images
- Raspbian: Download (Username: pi, Password: raspberry)
- Ubuntu Mate: Download (Set credentials after startup)
- Kali Linux: Download (Username: kali, Password: kali)
- Retropie: Download (Username: pi, Password: raspberry)
2. Burn Image to SD Card
1.
Download and install required tools:
2.
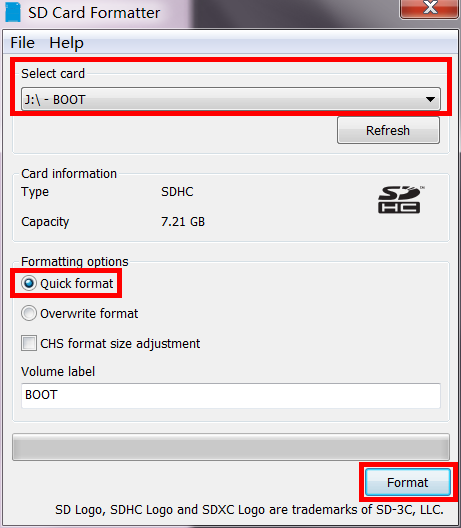
Format SD card using SD Card Formatter
3.
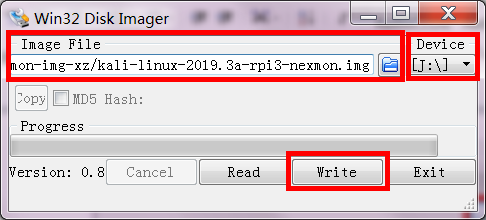
Burn image using Win32 Disk Imager

3. Modify Config.txt File
Add the following to the end of config.txt file:
hdmi_force_edid_audio=1 max_usb_current=1 hdmi_force_hotplug=1 config_hdmi_boost=7 hdmi_group=2 hdmi_mode=87 hdmi_drive=2 display_rotate=0 hdmi_cvt 1024 600 60 6 0 0 0
4. Insert SD Card

5. System Operation
After completing all connections, power on the Raspberry Pi to see display output with full touch functionality.