Specifications
Model Number :
BYD Song plus
Productname :
BYD D1
Electric Motor :
Permanent Magnet Synchronous Motor
Motor Power :
Up to 204 kW (for EV version)
Payment Terms :
L/C
Dimensions :
Length 4,540 mm, Width 1,800 mm, Height 1,690 mm
Topspeed :
120 km/h
Infotainment System :
12.8-inch touchscreen with DiLink OS
Seating Capacity :
5 seats
Chargingtime :
Around 1 hour (fast charging)
Torque :
180 Nm
Rangepercharge :
305 km (NEDC)
Maximum Power :
Up to 180 kW
Battery Type :
Pure electric
Brand Name :
BYD
Manufacturer :
BYD
Drivetype :
Electric
Drive Type :
Front-Wheel Drive / All-Wheel Drive
Delivery Time :
5-8 workdays
Seatingcapacity :
6-7 seats
Wheelbase :
2,800 mm
Targetmarket :
Ride-hailing and taxi services
Transmission :
Single-speed (EV) / 6-speed manual or CVT (ICE versions)
Motorpower :
100 kW
Maximum Torque :
Up to 330 Nm
MOQ :
1
Vehicle Type :
Compact SUV
Batterycapacity :
71 kWh
Seats :
5 People
Safetyfeatures :
Airbags, ABS, ESC, Collision Avoidance
Price Range :
Approx. $20,000 - $30,000 USD
Transmission Case :
E-CVT continuously variable transmission
Price :
Negotiable
Electricrange :
305 km (NEDC)
Vehicle Structure :
5-door 7-seater SUV
Dimensions (L X W X H) :
4710 mm x 1890 mm x 1700 mm
Description

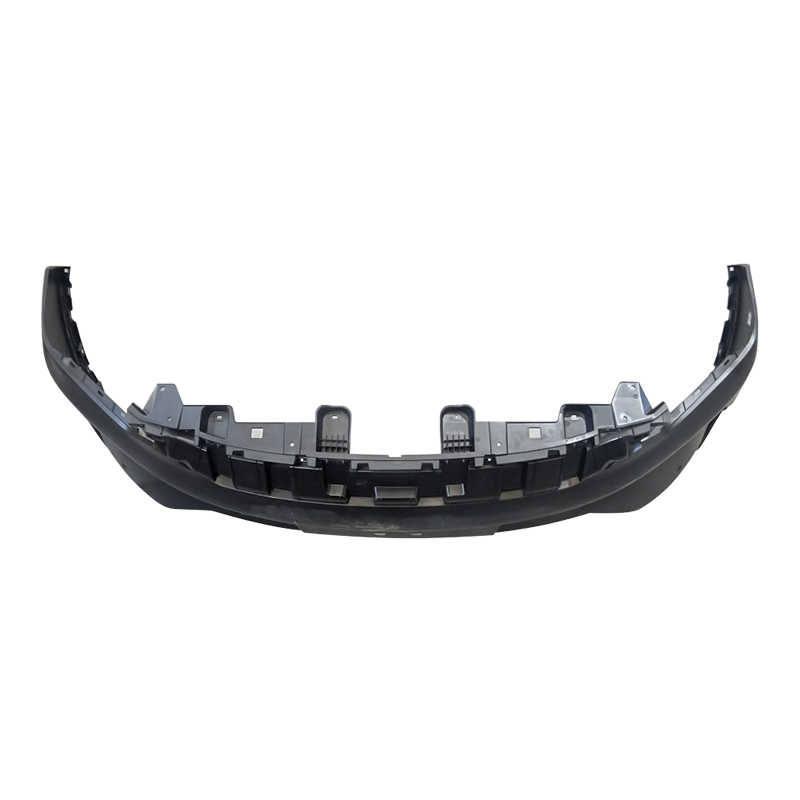
The BYD Song PLUS Rear Bumper Lower Skid Plate is a rear underbody protection accessory developed specifically for this vehicle model. Installed beneath the rear bumper area, it effectively prevents scratches and damage to the lower rear bumper and rear underbody components from gravel, curbs, and daily driving hazards.

This product is precision-tooled based on BYD Song PLUS original vehicle data. Made from premium aluminum alloy or manganese steel, it combines mechanical protection with aesthetic enhancement. It fits Song PLUS DM-i and EV all series, covering Champion Edition, Honor Edition, and other mainstream configurations.

BYD Song PLUS Rear Bumper Lower Skid Plate Installation Guide

Safety Precautions

NEV Chassis Safety Red Line: The Song PLUS DM-i/EV has a high-voltage battery pack flat-mounted on the chassis. Never place the jack on the battery pack casing, plastic side skirts, exhaust pipe, or suspension arms. Any compression deformation of the battery casing may damage high-voltage insulation, resulting in expensive repairs not covered by warranty.

Correct Jack Points: Located on both sides of the chassis under the doors, near the front and rear wheels, marked with notched thick metal ridges—4 points in total. The jack saddle must fully engage the notch without slipping.


Installation Steps

Step 1: Lift the Vehicle

Park the vehicle on flat, hard ground. Engage the electronic parking brake and shift to P. Use a lift or jack to raise the vehicle to a suitable height for underbody and rear bumper area access.

Step 2: Confirm Mounting Position and Holes

The rear bumper lower skid plate installs beneath the rear bumper area. Before installation, place the plate in position for a test fit and confirm the screw holes align with factory mounting points.

Note: Some mounting positions may require removing rear wheel arch liners or lower rear bumper plastic clips to expose the factory mounting points.

Step 3: Remove Original Clips or Screws

Use a pry tool or appropriate tool to remove the original clips or screws needed for mounting the skid plate. It is recommended to keep the removed original clips and screws, as some may need to be reused.

Step 4: Install Mounting Brackets (If Equipped)

Some rear bumper lower skid plates come with extension brackets or clips. If equipped, install the brackets to the factory mounting points or designated positions first, ensuring they are securely fastened.

Step 5: Hand-Tighten All Screws (Do Not Fully Tighten)

Core Principle: Thread all screws first, do not tighten any of them. Once all screws are in place, tighten them uniformly. This ensures the skid plate holes align perfectly with the mounting points, preventing misalignment of other holes caused by tightening one screw too early.

Step 6: Tighten All Screws

After confirming all screws are threaded, tighten them one by one in a diagonal sequence. Apply even force, avoiding over-tightening that could strip threads or damage plastic clips.

Step 7: Inspection and Road Test

Lower the vehicle and check that the skid plate is securely installed with no looseness. Start the vehicle and drive at low speed to confirm there is no abnormal vibration or noise.

Important Notes

Rear bumper lower skid plate installation is relatively simple: Unlike removing the entire rear bumper, lower skid plate installation typically only requires handling clips and screws in the bottom area without removing the complete bumper assembly.

Plastic clips are fragile: Plastic clips may break during removal of original clips. Prepare spare clips in advance.

Professional installation recommended: Involving vehicle lifting and underbody work, it is recommended to complete the installation at a professional repair shop or 4S store.

Send your message to this supplier
Send Now

BYD Song PLUS Rear Bumper Lower Skid Plate

Ask Latest Price
Model Number :
BYD Song plus
Productname :
BYD D1
Electric Motor :
Permanent Magnet Synchronous Motor
Motor Power :
Up to 204 kW (for EV version)
Payment Terms :
L/C
Dimensions :
Length 4,540 mm, Width 1,800 mm, Height 1,690 mm
Contact Supplier
BYD Song PLUS Rear Bumper Lower Skid Plate

Shijiazhuang Haobaijiu Trading Co., Ltd.

Verified Supplier
1 Years
beijing, beijing
Business Type :
Exporter
Main Products :
Total Annual :
1 million-2.5 million
Employee Number :
two hundred and thir
Certification Level :
Verified Supplier
Contact Supplier
Submit Requirement